Sometimes the most dramatic photographs happen serendipitously. You just happen to be in the right place at the right time. Sometimes they take a lot of forethought and planning. Often they require the use of a certain amount of Lightroom and Photoshop techniques to bring your vision to life. This image is a combination of all three of those things.
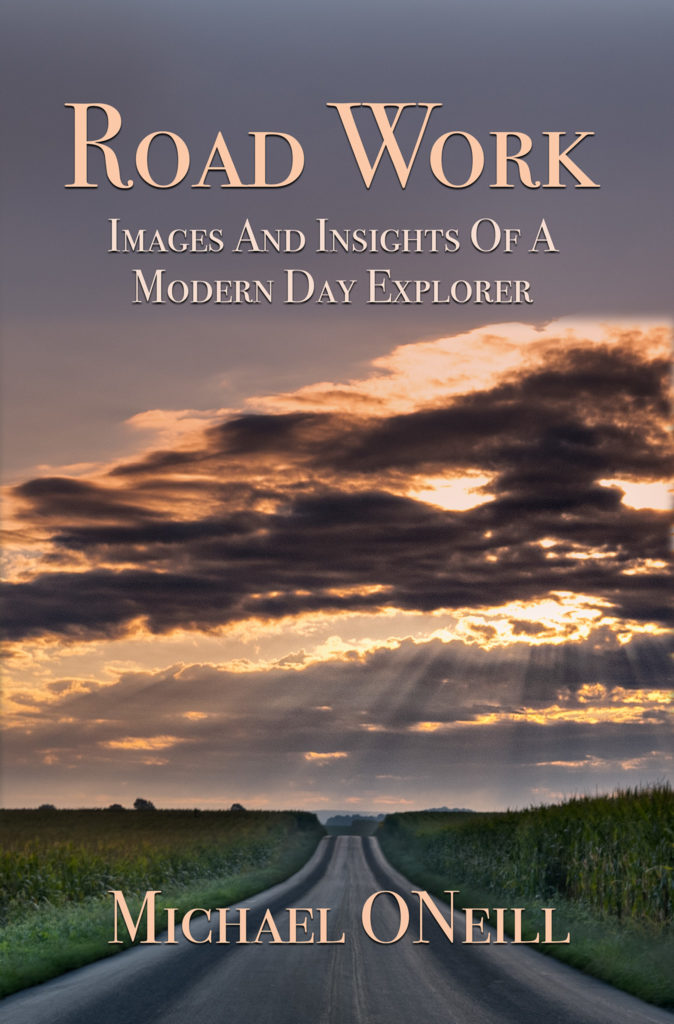
The front cover of the book used for the Kindle and iBook versions
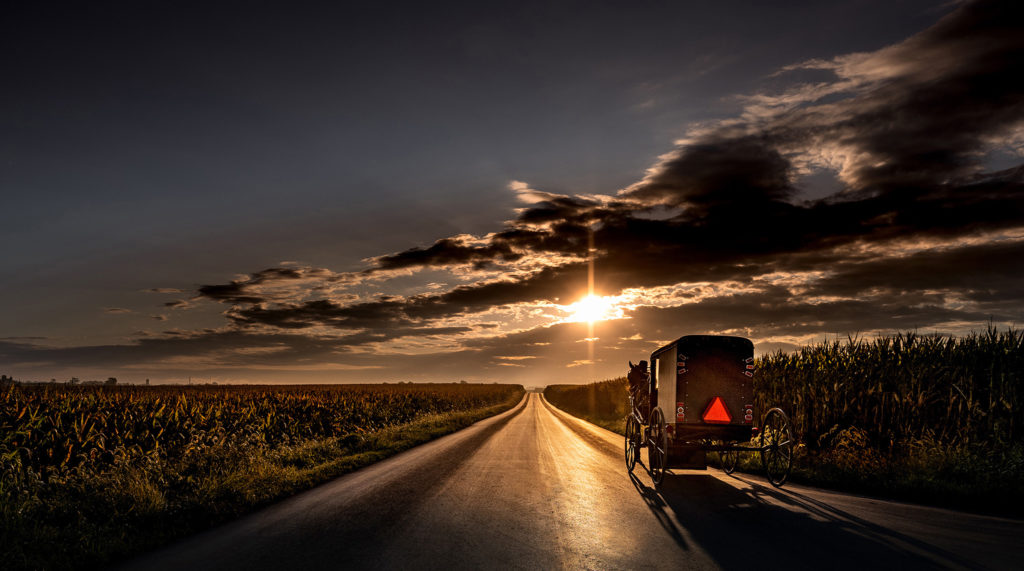
I was looking for a long, straight and deserted road that led to some interesting, but not overpowering, structure on the horizon.I found the perfect spot near Groffdale, Pennsylvania and marked it’s coordinates in my onboard GPS unit.Today’s bad weather would not yield the result I was looking for.I would return at sunrise the next morning to complete my mission.
Ignore The Weather Forecasters
In my book there’s a great account of what transpired just before sunrise the next day.Suffice it to say that it was nothing resembling what the visionaries at The National Weather Service had predicted.Being a meteorologist has to be the only occupation on the planet where you can be wrong eighty percent of the time and still remain gainfully employed.
After nearly four decades of touring by motorcycle, creating photographs on location and deep-sea fishing, I’ve gotten pretty adept at generating my own weather forecasts from available data.In a previous post about riding in the rain I shared some of my favorite resources.
The Early Bird Gets The Image
I’ve discussed before that the most dramatic images are usually captured in the hours around dawn and dusk.Today would be no different.I wanted to photograph my road scene in the minutes before sunrise, when the sky takes on the warm colors of the new day’s sun before it emerges above the horizon.At this moment in time the foreground areas of my image should be evenly lit and not be cast into silhouette by shooting directly into the sun.
A few choices were made before I released the shutter on the camera.For starters was the choice of camera body.I discussed my travel photography gear in a previous post.I carry both the Nikon Z7 and Z6II camera bodies in my kit.The Z6II arguably has a higher dynamic range than the Z7.It might have been better suited for what I was soon to encounter.The Z7 on the other hand is a high resolution beast!
The photograph I was after was going to be used as the cover image for my book.It would wrap fully around the front and back of the paperback volume so I went for the highest resolution available.The Z7 features a 46 megapixel imaging sensor!
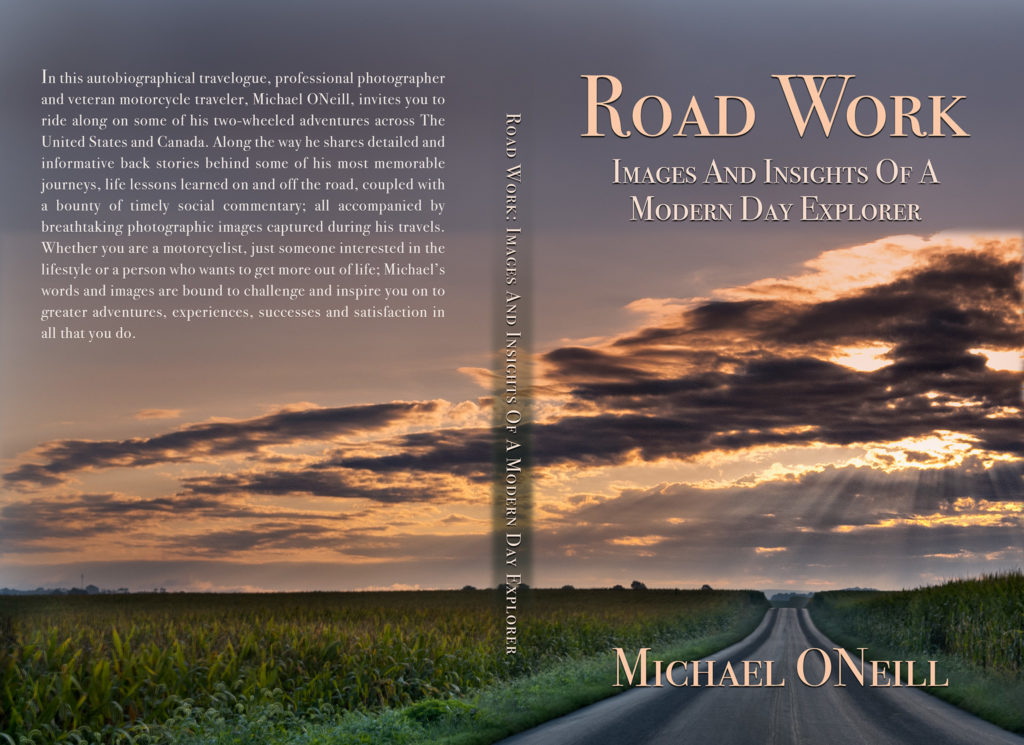
The full book cover wrapped around the front, spine and rear of the paperback version
Perspective
The image needed to have a very wide angle of view.The road in the picture would be centered on the cover of the book.The adjoining farmland to the left would wrap around to the rear cover.I set my chosen lens at its widest 14mm focal length, framed my image in the viewfinder and captured a few images exactly as I’d envisioned.
Serendipity
As luck would have it a new element entered into the equation.In the distance behind me I could hear the distinct sound of an approaching Amish buggy.The buggy would have two choices:it could turn right behind me onto the road off to the right of my camera position; or it could continue straight into my field of view.
It took an agonizingly long time for the buggy to arrive on the scene.By the time it did the sun had risen above the horizon and was burning straight into the lens of the camera.As any photographer knows, this is hardly an ideal situation.The buggy continued forward and into the scene I had framed in my viewfinder.
Quick Adjustment
I had to make an immediate exposure compensation for the glaring sun.I chose to do this with a shorter shutter speed; which would also help ‘freeze’ the moving buggy.As the buggy passed me by I was able to record about 10 images of the scene with the subject at varying distances from my camera.
At this point I already knew that some Adobe Lightroom and Photoshop techniques were going to have to be employed to finish the image.I had dialed down my exposure substantially to prevent the sun from being overexposed.It is fairly easy to recover detail in underexposed shadow areas of an image.It is all but impossible to restore severely overexposed highlights.
Coincidentally, that is a rule that has held true for far longer than the 40 years in which I’ve been creating images professionally.Digital imaging closely follows the formula used by commercial photographers who formerly used transparency films in their work.When faced with the choice; underexpose the shadow areas and do not overexpose the highlights.
Modern Miracles
The Lightroom and Photoshop techniques we have available to us today are nothing short of miraculous.As professional image makers we have an extraordinary array of digital tools at our disposal to enhance images.Coupled with the high dynamic range of today’s digital cameras we can capture images that were just a dream 20 years ago.
I’m not going to be that bitter “old guy” that laments the good old film days gone by.I have embraced digital imaging technology from the beginning and use it to my advantage all the time.In a previous post I discussed some of the philosophical issues surrounding digital manipulation of images.Today I’m just going to share my Lightroom and Photoshop techniques.
The RAW Truth
Every serious photographer shoots using the camera’s native RAW format.End of story.I’m not going to entertain any arguments on that point with anyone.There is just so much more potential…so much more useful digital information…in any camera’s RAW file.Heck; even iPhones have their own RAW file format these days.
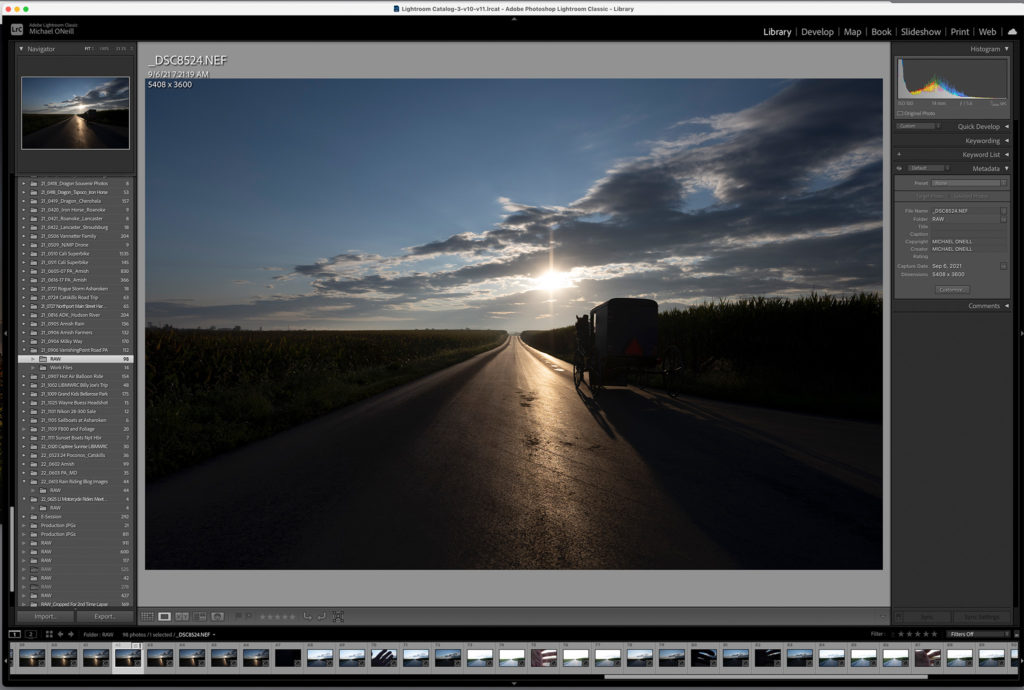
The camera original RAW image imported into the Adobe Lightroom Library Module
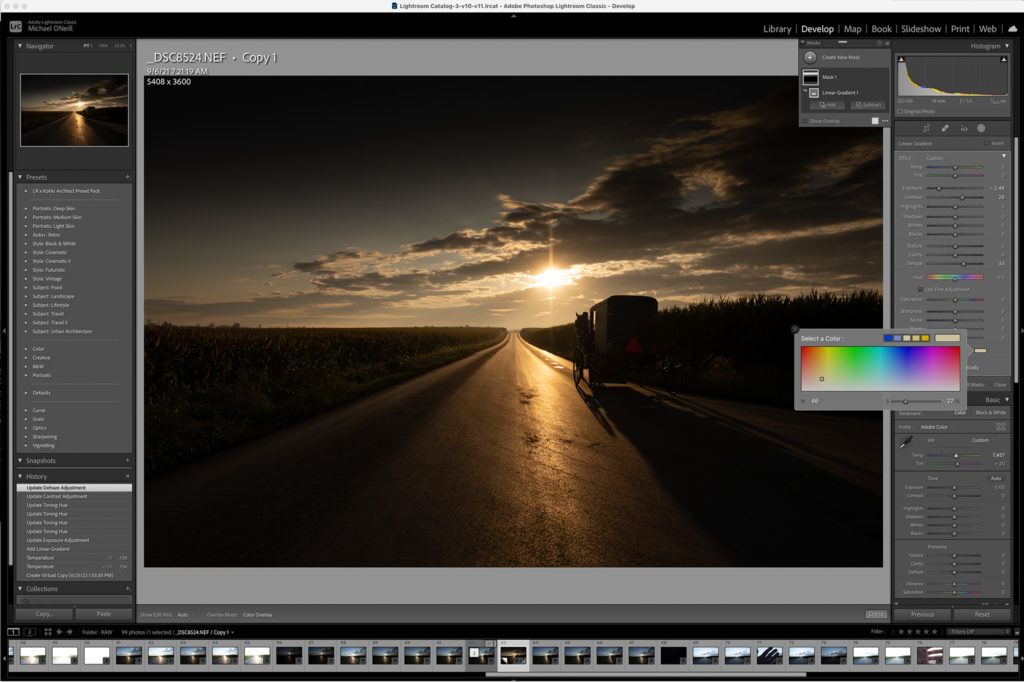
My post-processing workflow starts by opening the RAW file in Lightroom and making some base adjustments.You can see in the following screen shot that I have made a couple of quick adjustments.A gradient mask was added to the sky to lower the exposure in just that area of the image.A bit of warm color was added to the masked area.I shifted the white balance of the overall image to give it warmer tones and exported the ‘new’ image as a 16 bit TIFF file for enhancement in Photoshop.
Presets?
I’m often asked by other photographers what Lightroom presets I use.The answer is simple.None.Not any that are built into Lightroom.Not any that are sold by any third party.Two reasons.First: Presets are nothing more than adjustments you can make yourself using your own two eyes and the sliders in Lightroom’s develop module (albeit; maybe a little faster).
Second, and more importantly:If you use the same presets that every other photographer is using, then your work will look like every other photographer’s work.I don’t know about you, but I’d like to think that my creations are somewhat unique, even in a small way.
Off To Photoshop
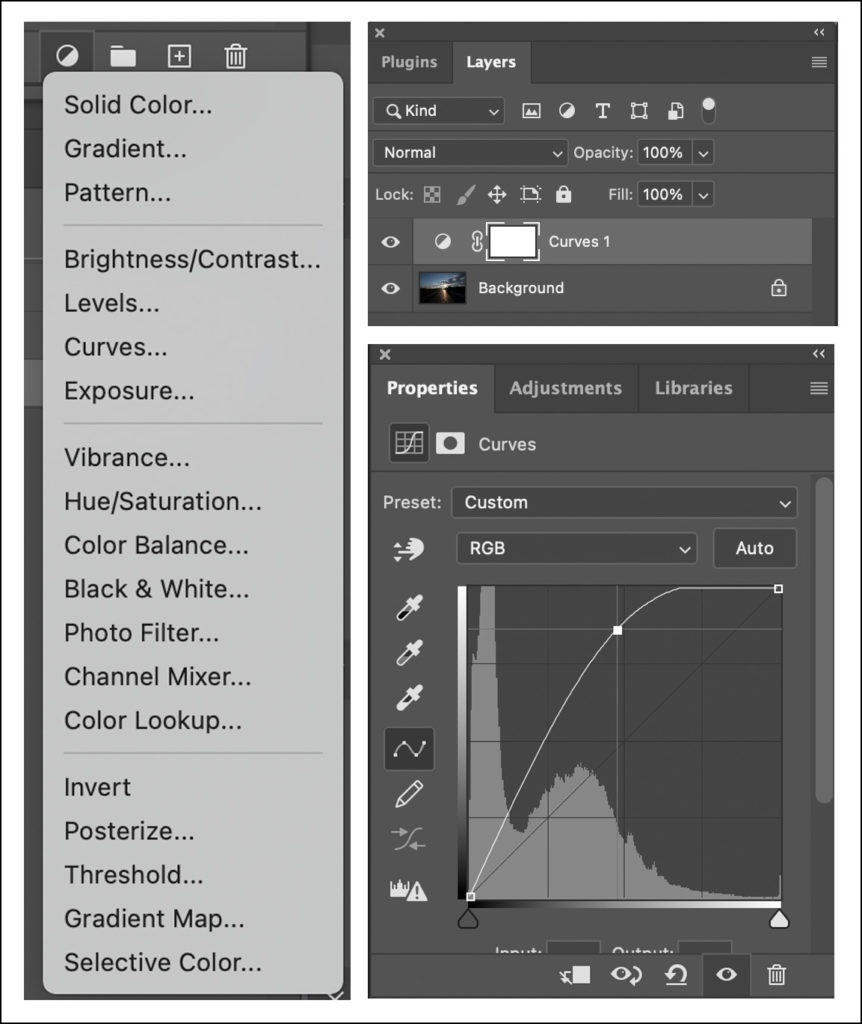
Once I’ve exported my adjusted RAW file the next steps in my workflow of Lightroom and Photoshop techniques take place in Photoshop.Using a “curves” adjustment layer mask I bring back all the detail that was ‘lost’ in the farmland to underexposure (while shooting directly into the sun).The beauty of using adjustment layer masks in Photoshop is that you can apply corrections precisely…adding the effect, subtracting the effect, adjusting brush sizes and shapes with precision, etc.
Creating a curves adjustment layer to boost the shadow details “lost” during exposure
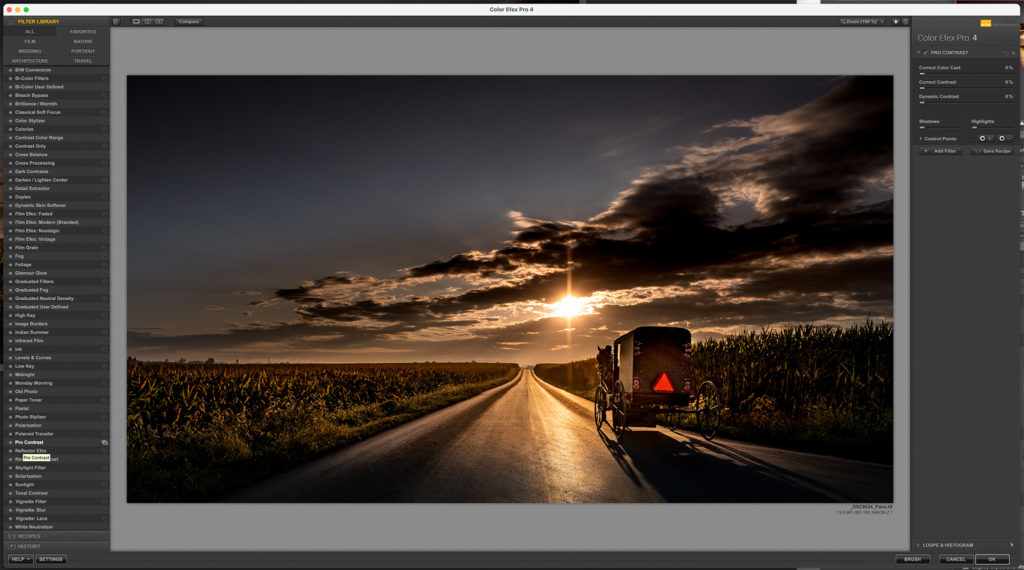
I then further processed the image using NIK Software’s Color EFX Pro Photoshop plugin.For this image I simply used the “Pro Contrast” filter to add some impact to the clouds in the sky.The NIK software suite has some incredible tools within it.I’ll be demonstrating some more of them in future posts.
The NIK Color EFX software interface being used as a plugin within Photoshop
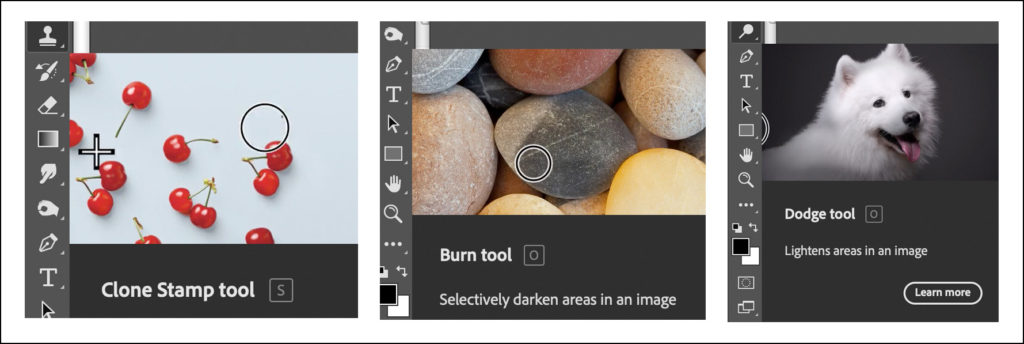
Last, but certainly not least, are the final tweaks.A little burning and dodging diminishes bright spots and brings out shadow detail in specific spots.Finally a combination of the Content-Aware Fill tool and the Clone Stamp were used to remove, from the pavement, the unsightly droppings from the passing horses.
Final tweaks include burning, dodging and cloning out undesirable elements
Worth The Effort?
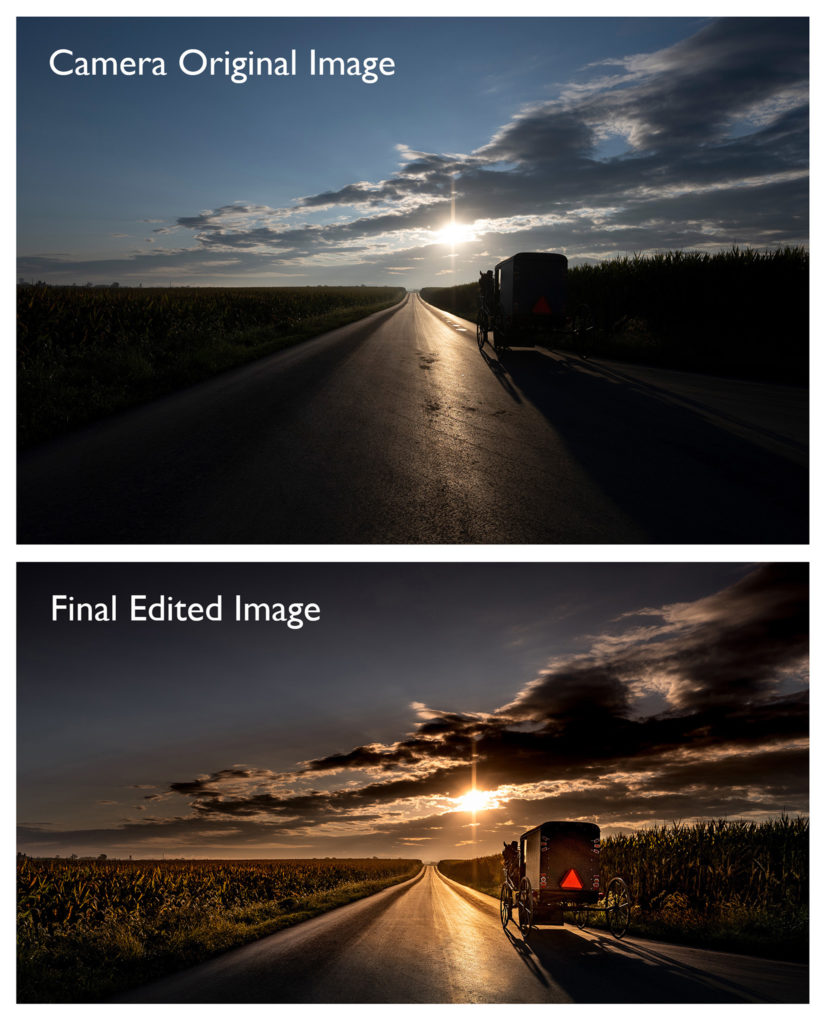
I would say YES unequivocally.It really isn’t that much effort once you have a handle on exactly what it is that you’ve envisioned; and you perfect the process of enhancing your images to meet your expectations.Like any other skill, you will get better (and faster) the more you practice it.I estimate that it took less than four minutes for me take this file from its RAW beginnings to the finished image you see here.It took you a lot longer to read about it than it took me to actually do it!
The original image as captured in the camera compared to the final enhanced version
Conclusion
As always, we encourage you to leave your comments and/or questions below.Be sure to subscribe to Roadcraft USA to receive periodic notifications when new features hit the blog.Thanks for reading.Now get out there and shoot something stunning!
Click Here to view an interactive visual index page where you can quickly browse through all of the great features that are published on the Roadcraft USA blog.
2 thoughts on “AMISH SUNRISE • HOW I GOT THE SHOT”
Hi Michael. Great stuff as always. I read the iPhone RAW format mention and felt it worth noting the Samsung S22 Ultra I’m now carrying has RAW as well. I’m in love with the camera capability on this phone!
Hi Michael. Great stuff as always. I read the iPhone RAW format mention and felt it worth noting the Samsung S22 Ultra I’m now carrying has RAW as well. I’m in love with the camera capability on this phone!
They keep getting better and better, Chris. I’m amazed at the performance of these smartphone cameras when used under ideal conditions.