In the previous post we discussed motion blur techniques at length.Creating images with impact is your main objective as a professional motorsports photographer.However, you are not limited to motion blur techniques to capture the essence of a speed contest. We’ll discuss some other ways herein and show some examples.
This is going to be a “Show and Tell” type of post.I’ll attempt to explain my thought process before the image was captured.This will include my vision for the image as well as the various camera settings used to bring them to fruition.Let’s get started…
Gone In A Flash
If you’ve never attended an NHRA National drag racing event in person you really have no appreciation for how fast things happen.Watching it on television provides no real sense of the mind-boggling speeds at which these cars accelerate.When you’re a credentialed photographer standing trackside the word speed enters a whole new dimension.
NHRA Top Fuel Dragsters and Funny Cars accelerate from 0-100 MPH in about 3/4 second!One second after it launches from the starting line it is well on its way to 300+ MPH and has already passed the group of professional photographers gathered.All of these photographers have one goal in mind.Creating images with impact.
Reaction Time • It’s A Racing Thing
The race-starting lights at a drag race are mounted on a post known as “the tree”.In the professional classes of Top Fuel Dragster, Funny Car and Pro Stock the lights on the tree move very quickly.When a single light turns green the drivers move their cars into the starting position.When the cars reach that exact legal start line a second green light is illuminated.This is known as the car being “staged”.When both cars are staged four green lights are displayed.
The tree will then display a vertical row of three amber lights; but not for very long. Just .400 of a second later the green light will be displayed and the race is on.How fast the driver reacts to this green light coming on (and racing the car forward) is known as the driver’s reaction time.In many cases the race is won or lost right at this very moment.The cars themselves are pretty equal in performance.Often the driver’s reaction time to that green light constitutes the race-winning difference.
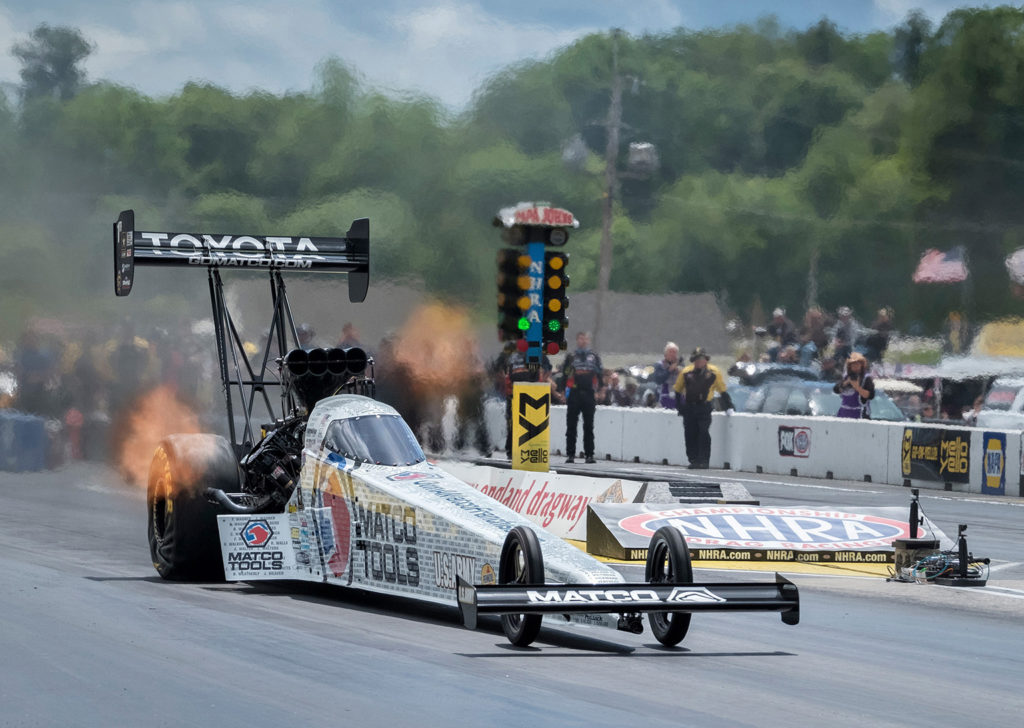
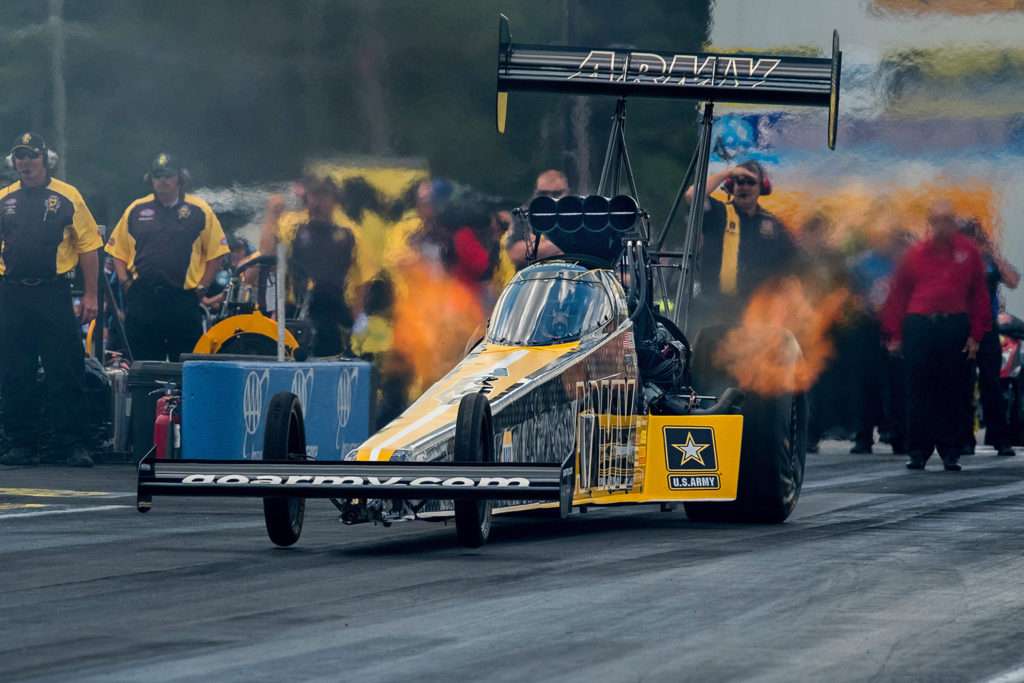
The exact moment when a Top Fuel Dragster or Funny Car launches from the starting line is pretty much your split-second window of opportunity for creating images with impact.Flames will shoot from the car’s exhaust pipes as the nitromethane fuel they burn is ignited.Less than one second later the cars are gone from the starting line photographer’s view.Three seconds later the photographers stationed near “The Big End” of the track (the finish line) will watch the cars deploy parachutes to slow down.The entire race takes less than four seconds!
You need to be ready.At the starting line the photographers are watching the tree as intently as the racers are.Your camera is pointed at the car(s) on the starting line.When the lights turn amber start firing.You’ll obviously be shooting in your camera’s high speed continuous burst shooting mode.My Nikon Z6II mirrorless camera can capture 14 JPEG frames per second using a single autofocus point.I always shoot in the maximum bit rate RAW format which yields 10 frames per second.
You’re not going to get 10 usable images out of that 10 shot burst unless you want to shoot wide angle views that might keep the car(s) in frame, and in focus, for a slightly longer period of time.Such shots have no esthetic appeal.Remember: we’re creating images with impact.We want to fill the frame with the race car.We want to capture those flames exploding from the exhaust pipes.We want that one single “money shot”.Like the racers themselves, the photographer’s reaction time is critical.
Let’s Slow Things Down A Bit
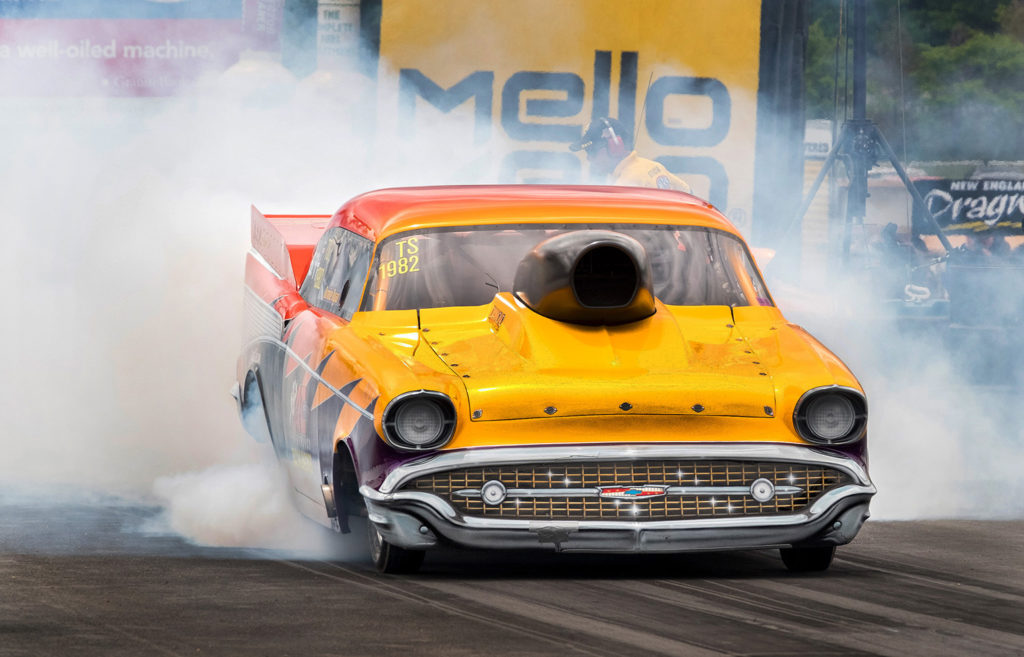
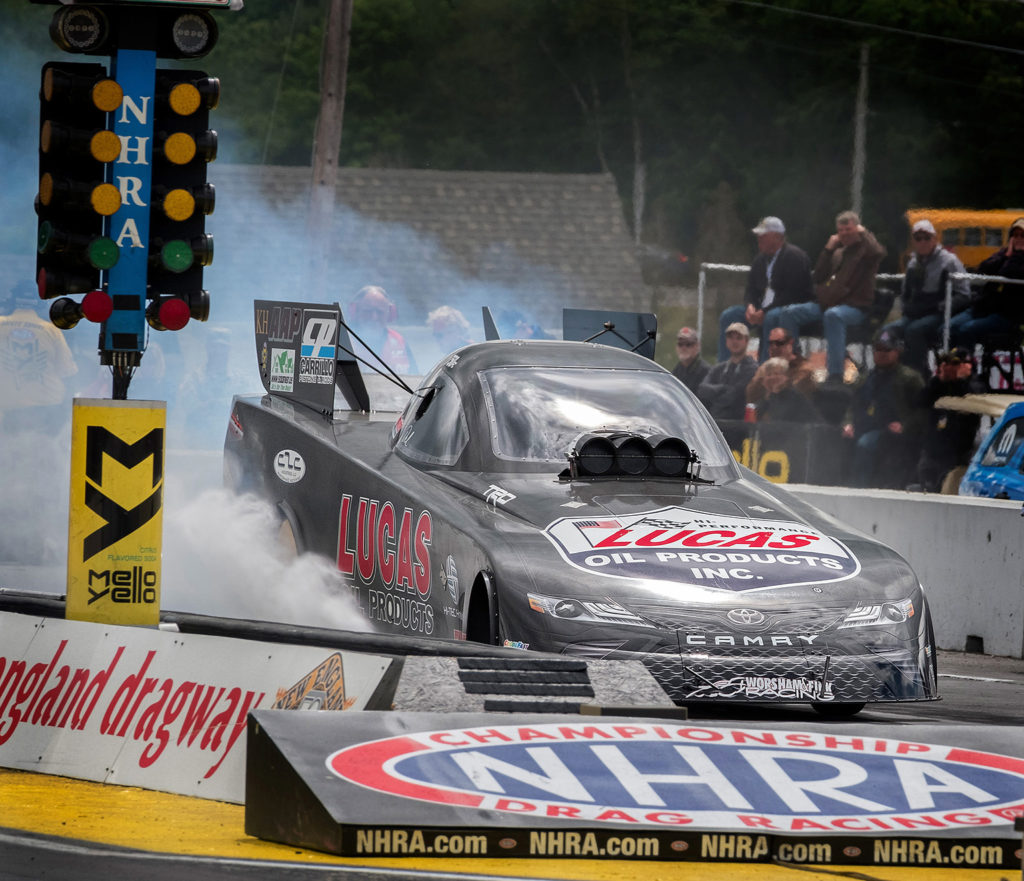
Another opportunity for creating images with impact at the drag strip is when the drivers execute their burnouts.The burnout is when the driver spins the rear tires intentionally and moves forward for a few seconds before the race.This is done to heat up the tires, clear them of any debris and make them sticky.It also lays a layer of rubber down on the racetrack for added traction.
It also provides a great photo opportunity as the smoke screen created is quite dramatic.Any one of multiple vantage points are effective.Looking towards the front of the car is the most common view, with tire smoke billowing up from behind the car.
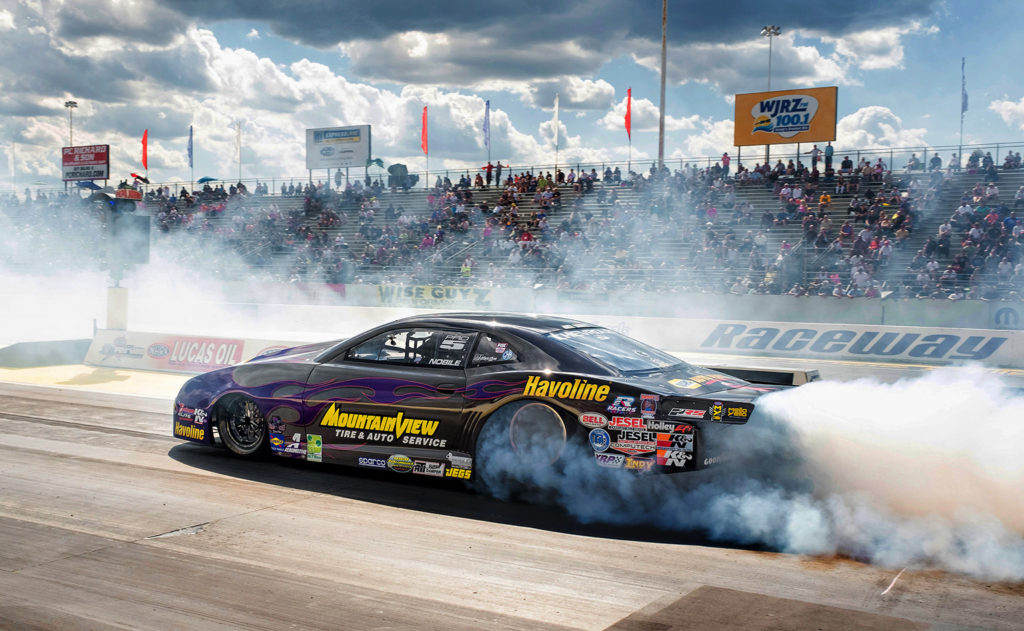
A side view of the car passing the camera can also be effective for a photograph.In the image below pro-stock racer, Vincent Nobile, is “laying down” his burnout.Shooting towards the sun provided great illumination on the smoke pouring out from the car’s rear tires.This image was captured on a Nikon Z6 camera with an AF-S Nikkor 24-70mm f/2.8E ED zoom lens.Focal length was 36mm.Manual exposure was 1/1000 sec • f/7.1 • ISO 800. Wide area AF was used as I panned the camera with the car as it moved down the track.
In the image below I surrounded the race car with a combination of the NHRA logo in the foreground and the starting tree along the left side of the frame.This image was captured on a Nikon Z6 camera with an AF-S Nikkor 300mm f/4E PF ED VR telephoto lens and FTZ II mount adapter.Manual exposure was 1/1000 sec • f/8 • ISO 800.Wide area AF was used as the car moved forward.
Back To The Road Courses
In the previous post I described the motion blur techniques I use when creating images with impact.Road racing is truly an awe-inspiring, exciting sport.To convey this in a still image requires a little planning and imagination from the photographer.Let’s face it, a single motorcycle going straight down the tarmac is not a very exciting image.Unless of course you happen to be the one in the saddle with your hands on the handlebars.
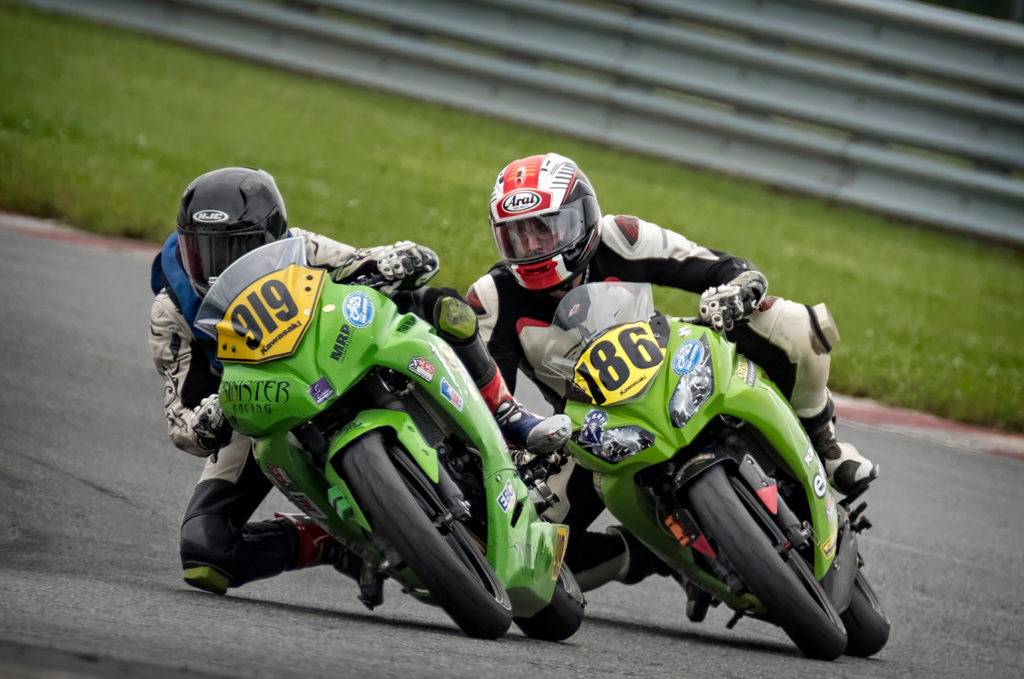
But put two of those motorcycles together.Set them inches apart, leaning into a curve at 60 MPH, battling to see who is the dominant competitor.Now you’ve got yourself an image!This is where the autofocus performance of today’s modern digital cameras really comes in to play.I might fire off ten or more frames as the duel unfolds before my lens.You don’t know ahead of time how the racer’s are going to move, in what direction or when.
Every one of those ten frames needs to be in sharp focus because the winning image won’t be determined until after the race.It is here that I place all of my faith in the incredible autofocus system on the Nikon Z6II mirrorless camera.The image above was captured using the AF-S Nikkor 500mm f/5.6E PF ED VR telephoto lens, and the Nikon AFS Teleconverter TC-14E III.This combination was paired to the Nikon Z6II camera using the mount adapter FTZ II.
Someone Will Ask What My Settings Were
The effective focal length, therefore was 700mm!Exposure was 1/1000 sec • f/8 • ISO 800.I used shutter priority mode with the shutter set at the 1/1000 second mark.This was chosen to insure that the moving motorcycles would remain tack sharp.The camera chose the aperture.The camera was pointed towards the corner as the motorcycles approached.I had no idea exactly what line the bikes would be taking through the corner, which one would emerge first or exactly where they would appear. I simply had the camera pointed in their general approach direction.
Less than one second before this image was captured the motorcycles were not in view.They came into view at approximately 60 MPH and were increasing in speed as they carved through the corner.I had set the camera to AF-Area Mode: Dynamic-Area AF.Focus mode was set to Continuous AF.Release mode was set to Continuous H and Focus tracking with lock-on was set to 3.Vibration reduction was set to Sport.I simply pushed the button and Nikon’s technology took over from there.The camera “spotted” the leader of the race, locked focus in on that bike, and maintained perfect focus until the racers left my field of view.
When All Else Fails, Read The Instructions
As I said in the previous post, I’ve grown so weary of reading complaints on photography forums about how poorly some cameras perform compared to others.It’s easy to blame the camera manufacturer when your images don’t turn out the way you would have liked.God knows there are enough YouTube “Influencers” and keyboard warriors out there doing just that.And people buy into it because it’s easy.No accountability.It’s not their fault their pictures aren’t as good as they would have liked.
I’d be willing to bet that 75% of these experts, and 90% of their audiences, have never opened the manual that came with their cameras.Their frustration is not being caused by a fault in the camera’s software.It won’t be fixed by some miracle firmware update.It’s not about an inferior product design.It’s about being knowledgable about your equipment and using it properly.These folks are screaming for better technology.They don’t even have an understanding of the tech that’s in their hands already.
The settings I outlined above are not some great secret formula I discovered on my own.They’re in the owner’s manual.Maybe you don’t know where to look for that piece of literature.Maybe it’s still in its plastic wrapper in the box in a feeble attempt to preserve the resale value of your kit when you trade it for something “better”.You can read the information here on Nikon’s website in the Technical Solutions area.Don’t rely on the opinions of some “influencer” who is creating controversial and inaccurate content in the name of online popularity.Go to the horse’s mouth.
If It’s Not Broken, Don’t Fix It
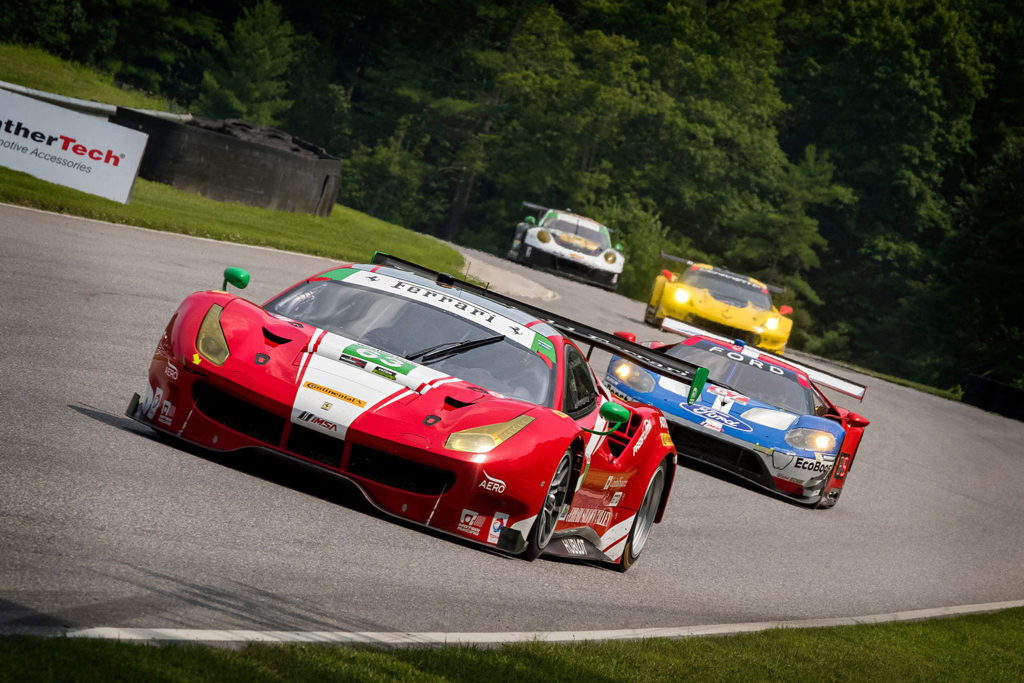
The same camera settings were used in the image below.In this case a group of race cars came into view after cresting a hill.They are moving down this stretch of racetrack in excess of 100 MPH and the Nikon’s AF system is tracking the unfolding scene perfectly.You’ll notice I tilted the camera slightly in a clockwise direction.Sometimes when creating images with impact a little tilt like this can add so much to the dynamics of an image.I actually rotated the camera continuously from level to 90 degrees clockwise as I fired off this sequence.All of the images in the series were tack sharp.This frame was my favorite.
The technical and exposure data for the above image is as follows.Nikon Z6II camera.AF-S Nikkor 300mm f/4E PF ED VR telephoto lens with FTZ II mount adapter .Manual exposure was 1/1000 sec • f/11 • ISO 1600.
Wrapping It Up…Almost
Dynamic-Area AF is not always the right choice in motorsports photography.In the next episode in the series I’ll explain why.As always we welcome your comments below.Be sure to subscribe to Roadcraft USA for occasional notifications when new features drop on the blog.
Please help support the Roadcraft USA online resource by making product purchases through the links in this post.As Amazon Associates we earn commissions from qualifying purchases made through these links.There is no additional cost to you whatsoever.Thank you for your support!
Click Here to view an interactive visual index page where you can quickly browse through all of the great features that are published on the Roadcraft USA blog.