In this tutorial we’ll be discussing long exposure photography techniques.In particular we’ll discuss how to achieve that beautiful flowing water effect in your images.
If you’re a serious photographer who follows the Roadcraft USA lessons, chances are you already have most, if not all of the equipment necessary to produce this type of image.Once again you will discover that it’s not about the gear you own and use.It’s about how you use it.It’s about technique.Fundamentals.Let’s get started.
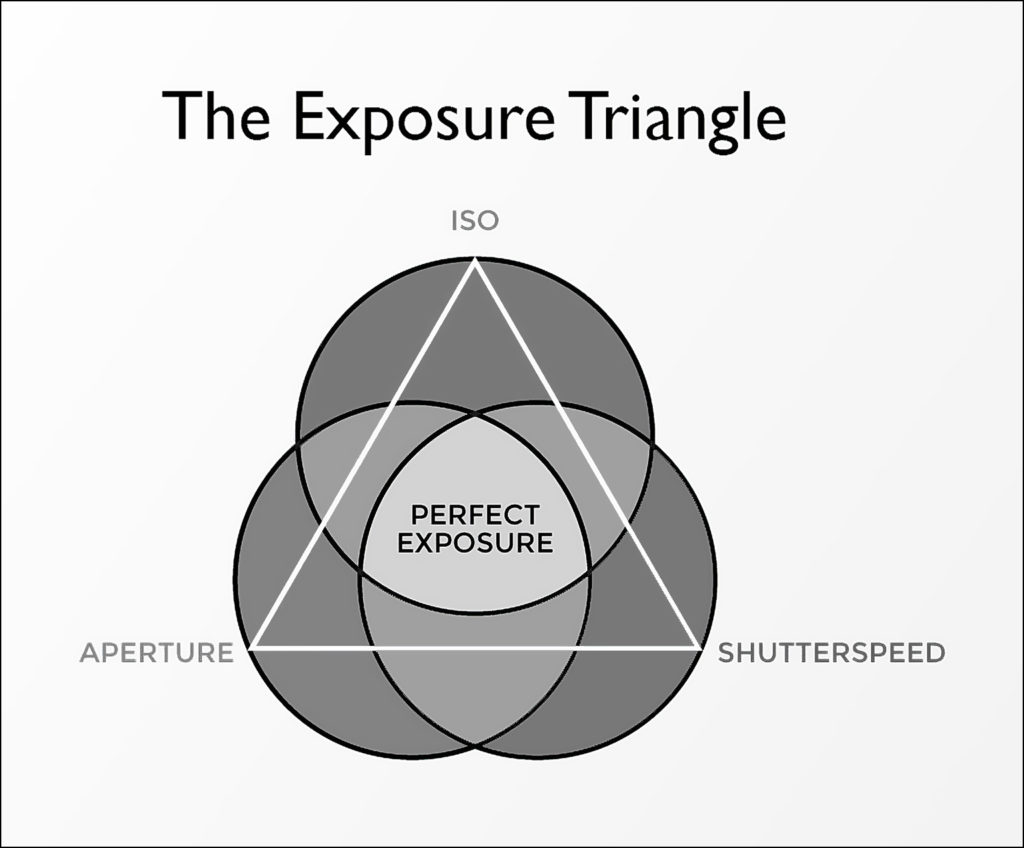
The Basics of Photographic Exposure
Proper photographic exposure is the result of the correct combination of three variables.Shutter speed, aperture and ISO.When the photographer (or their automatic exposure camera) chooses the proper combination of those three interrelated items a proper photographic exposure will result.
The relationship between shutter speed, aperture and ISO is absolute!One f/stop of aperture equals one shutter speed which, in turn, equals one step in ISO.If you change any one of the three variables, a corresponding change of one of the others will yield the same perfect exposure.It’s science.It’s simple mathematics.
The practical application of using shutter speed creatively is illustrated in the second row of the chart below.For example: an exposure of 1/500 sec will freeze the action in a perfectly exposed image as one taken at 1/2 sec will cause moving objects to blur.
Use This Knowledge Creatively
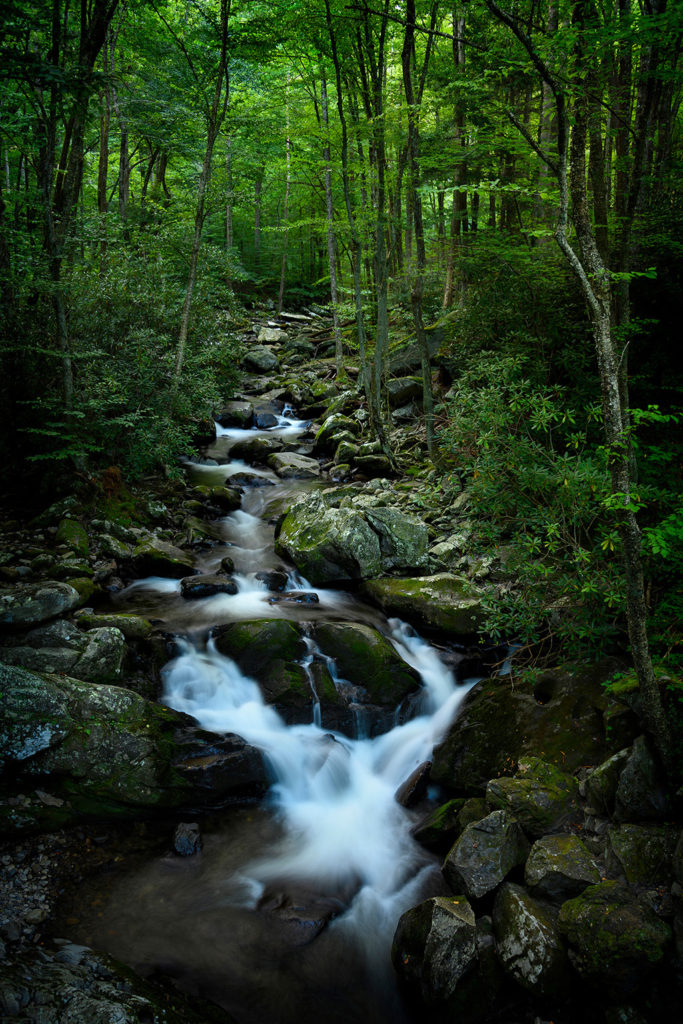
Armed with this knowledge (and a camera you are capable of controlling) you can use this science towards achieving your creative vision while implementing long exposure photography techniques.In the case study we present here our objective is to blur the moving object in our photograph…the water.To do so we must choose a long shutter speed.When the moving water is recorded at a slow shutter speed it will take on a smooth, silky and dreamlike flowing appearance.The rest of the image (which is motionless) will not be affected.
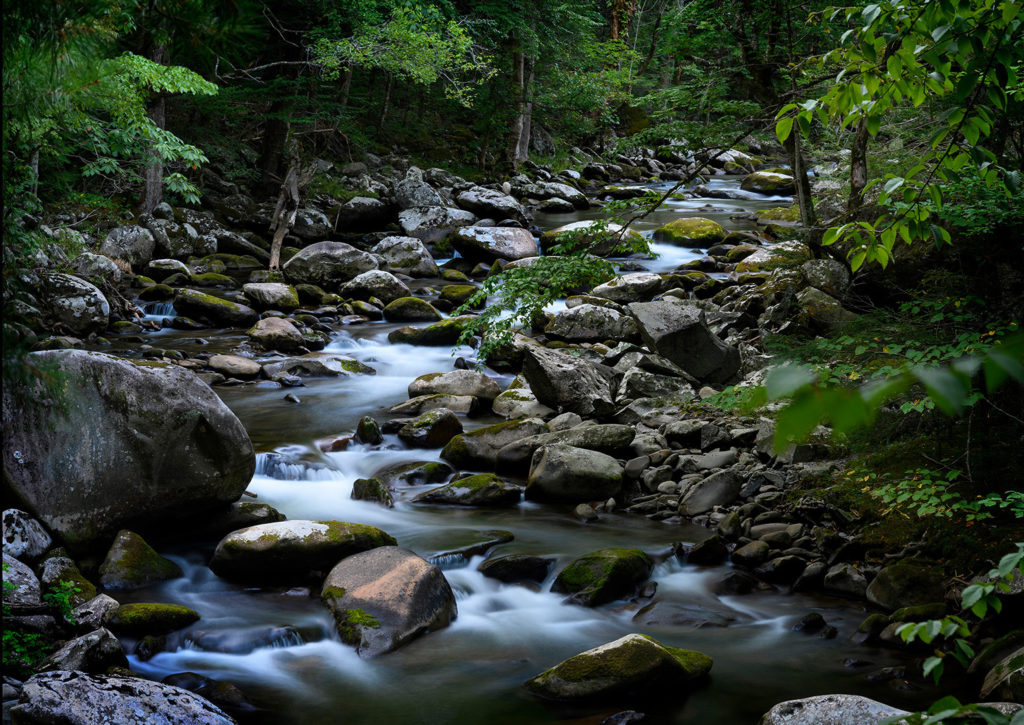
The technique, therefore, is simply choosing a combination of shutter speed, aperture and ISO to achieve a proper exposure for the whole scene.You must choose a slow/long shutter speed to create the flowing water effect.Accordingly you must adjust your aperture and/or ISO rating to compensate for the longer shutter speed.Because…math.The mountain stream below was captured at f/5.6 using an ISO rating of 64.The shutter speed was a long, slow 2 seconds.
I prefer to take total manual control of my camera when executing long exposure photographs.This is not to say that you can’t achieve good results using your camera’s auto-exposure functions.To do so you obviously have to use the camera’s shutter priority auto-exposure mode.Remember, you need a long exposure to get that flowing water effect.
If you’re going to go the auto-exposure route set your camera in shutter priority mode and pick a long exposure time.I would suggest starting with a shutter speed of two seconds.Use a low ISO rating…say 100.Let your camera pick the aperture to achieve the proper exposure.
The Digital Advantage
I’ve been creating images using these long exposure photography techniques for decades.The science hasn’t changed.It never will.The relationship between shutter speed, aperture and ISO are absolute.It has gotten a lot easier to implement in the digital era, however.For starters the reciprocity effect of using long exposure times when shooting film is a thing of the past.Unless you have any intention of shooting film in these digital times you need not even concern yourself with what reciprocity failure is.
The most significant digital advantage is the instant feedback you get.You get to see your image the very second it has been recorded.You get to assess the results and make any changes you deem necessary.This is so very important when photographing moving water.It is very easy to overdo it.If your shutter speed is too long the water may lose that silky smooth look you’re trying to achieve and just become one big, blurry mess!Conversely, if you haven’t chosen a long enough exposure you may not get enough of the flowing water effect.
Give your image a good look after you’ve recorded it.If in doubt take multiple versions of the image at different shutter speeds.If you’re shooting in manual exposure mode, remember that you’ll have to make the appropriate compensation to your aperture or ISO rating to maintain proper exposure with the new shutter speed you choose.I do this “shutter speed bracketing” as a matter of normal practice when photographing flowing water scenes.I generally don’t make my final choice until I’m back in front of my computer when I can study the images closely, side-by-side, in a controlled environment.
Steady As You Go
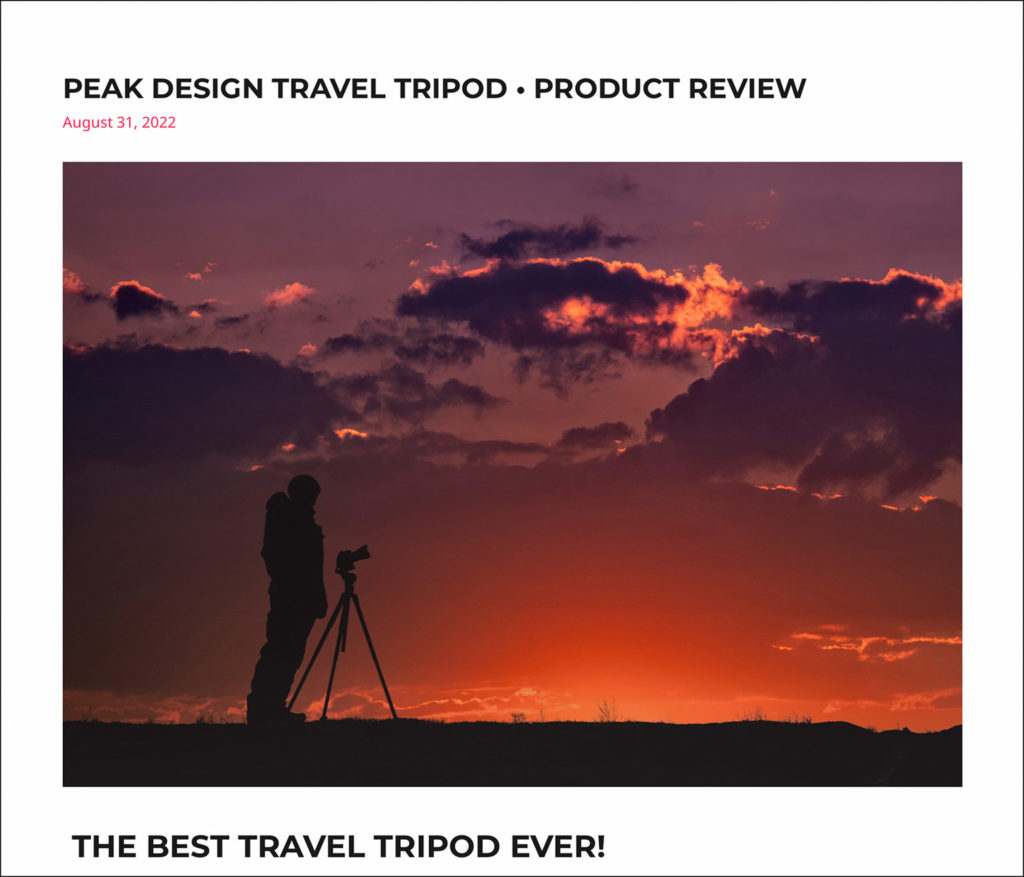
Needless to say you’ll need to hold your camera absolutely steady when using long, slow shutter speeds.Any camera shake will yield a useless blurry image.The use of a solid tripod is highly recommended.My personal choice is the Peak Design Travel Tripod.
Beyond any doubt it is the best travel tripod I’ve ever used.I am so excited about this piece of gear that I did an entire product review blog post about it.I carry their aluminum model.For those adventurers with bigger budgets, who have to concern themselves with every ounce they carry, there is also a carbon fiber version.
It’s In The Way That You Use It
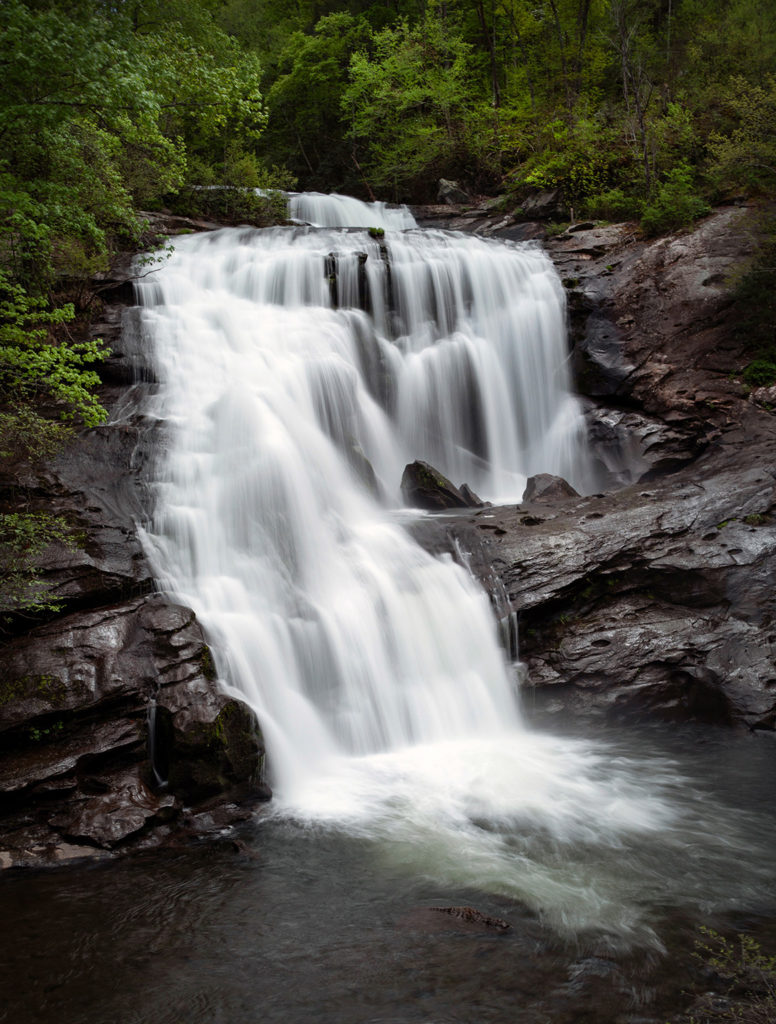
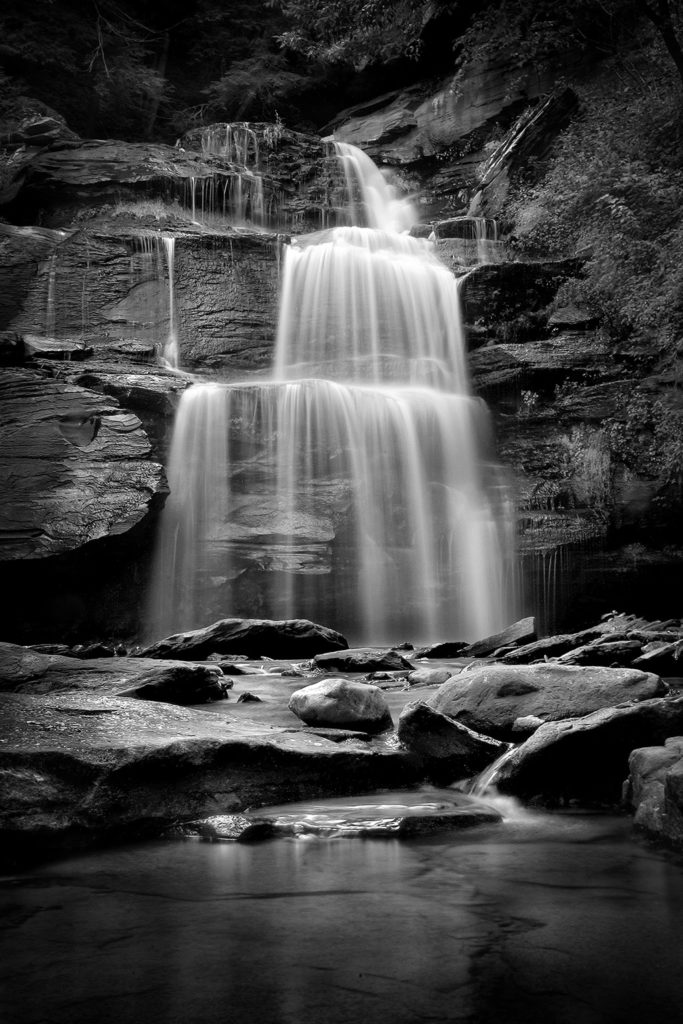
I started this post stating that employing long exposure photography techniques is not about the gear you own but, rather, how you use it.To that end I would like to show you a waterfall motion blur image I created quite a ways back.This is one of my favorite images ever, and still hangs in my home gallery as a 16” X 20” matted and framed print.
I created this image back in 2005 using a Nikon D1x DSLR…the first digital camera I owned when I made the transition from film to digital.That’s right.A 5 megapixel DX format camera from more than 20 years ago!A dinosaur by today’s standards.Furthermore, I was not carrying a tripod when I hiked into the woods in The Catskill Mountains of New York to visit this spot.The exposure was 6 seconds at f/22 using the camera’s lowest ISO rating of 125.I pulled this off by propping the camera up on the ground with a couple of rocks that I pulled from the pool of water at the base of the waterfall!
More To Follow
That about wraps it up for this basic introduction to using long exposure photography techniques in waterscape photographs.In the next post we’ll be discussing the topic in greater depth. We’ll be talking about the use of neutral density filters to further control exposure.Furthermore, we’ll be talking about the one special thing you already have in your possession that will enable you to create truly unique works of art.
Click Here to view an interactive visual index page where you can quickly browse through all of the great features that are published on the Roadcraft USA blog.
Please help support the Roadcraft USA online resource by making product purchases through the links in this post.As Amazon Associates we earn commissions from qualifying purchases made through these links.There is no additional cost to you whatsoever.Thank you for your support!