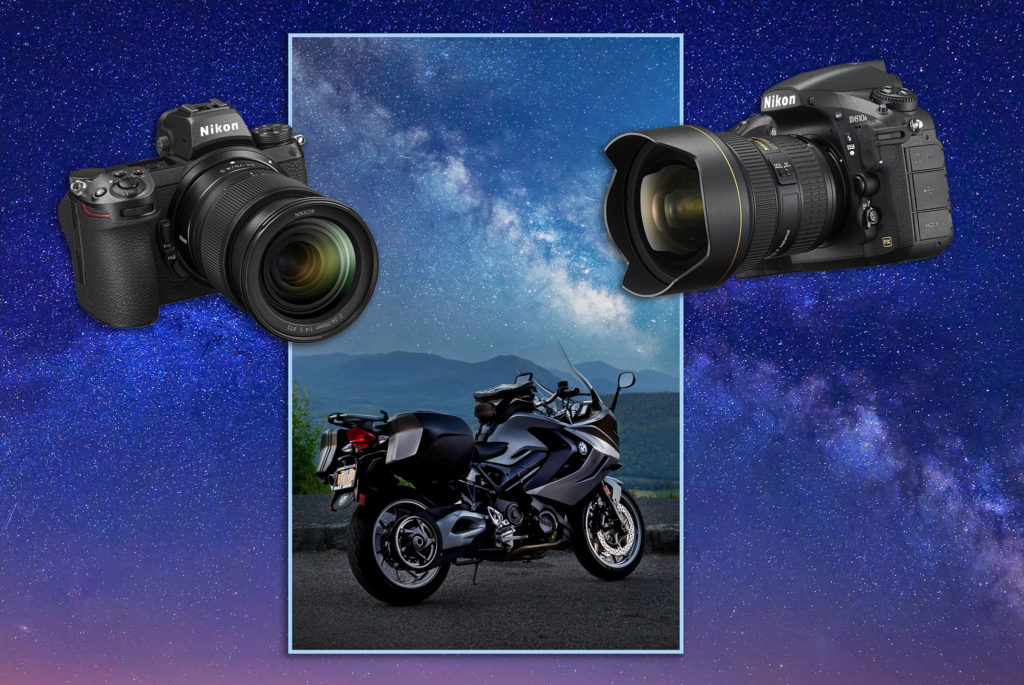
Thanks for stopping by to check out this Photoshop image composites tutorial. Let’s get the ‘full disclosure’ thing out of the way right up front. This image is actually a composite of two individual photographs. The two photographs used were taken 5 years apart on two different cameras. In two different locations 900 miles away from each other. Could it have been done in camera? Yes…without too much difficulty technically. I’ll explain how later in this post. But when you (or the magazine’s art director) have a specific shot in mind, a deadline to meet, a modest budget and a location shot that requires precise, total cooperation on Mother Nature’s part; you do what you have to do.
The image we’ll be discussing today
Philosophical Questions
There is much being said today about whether or not a photograph is “real” or “pure”. There are so many digital tools photographers have at their disposal these days. If you hope to remain relevant and competitive as a working commercial photographer you are all but forced to take advantage of them. Adobe’s cornerstone software product, Photoshop, is probably the tool that comes to most people’s minds.
Photoshop is such a renowned product that its very name has become widely accepted as a verb by both professionals and the average person alike. People look at celebrity photographs and immediately assume that they have been “Photoshopped”. People look at Photoshop image composites, like the one we’re showcasing here, and automatically assume it has been composited.
It’s A New (Digital) World
I’ve always been one to adopt emerging technologies as they come to market. I was crafting Photoshop image composites long before digital photography even hit the scene. In ‘the old days’ I would capture images on medium format film cameras and large format view cameras. Some of you youngsters may have to Google those terms to find out what I’m talking about.
After capturing the images on transparency film (Google it) the processed transparencies would be scanned on a drum scanner in a pre-press house. (Might as well keep that Google search window open). The output from the scanner was generally used to make the color separations required for offset printing. In my case the scanner output was saved to disk in a format readable by early versions of Photoshop.
So I had kind of a jump on this whole Photoshop image composites thing. There are images on my photography web site that were composited many years ago…some 25 years ago or more. Photoshop was pretty clumsy back then, but like any other technique; the better grounded you are in the fundamentals, the easier it will be to take advantage of the newest capabilities. The newest versions of Photoshop do miraculous things…and the application will only get more powerful as AI (Artificial Intelligence) advancements are made.
The Beauty Of Photoshop Image Composites
Image composites that used to take 2-3 days to craft in camera on the ground glass (Google it…LOL) can now be done with relative ease. All you need is a DSLR or mirrorless digital camera, a personal computer, and a good working knowledge of Photoshop. Even the most complex Photoshop image composites can be executed in a couple of minutes time.
With the technology comes the flexibility to alter exposure, contrast, color balance and other parameters for each individual exposure/subject…a luxury we didn’t have when we were doing this kind of stuff in camera. It’s called progress, folks. Just like the switch from film to digital capture. Or the switch from plates to film before that. Or the advent of photography following basic drawing and painting by traditional artists before that. Or…well, you get the idea. Embrace the new technologies or become irrelevant in your industry.
Getting The Individual Shot • The Milky Way
The first capture for this Photoshop image composites example was The Milky Way. I had my first experience with astrophotography back in 2015, during a motorcycle road trip to Acadia National Park. You can read more about that experience on a previous blog post. In addition to capturing some images of natural subjects along the south-facing waterfront, I also captured some frames of just the night sky with little, or nothing, in the foreground. It is one of those shots that you are seeing in this image.

A couple of the Milky Way images captured in Acadia National Park
On this outing I had the privilege of using the Nikon D810A DSLR camera for my night sky captures. The D810A is arguably the finest digital camera made for long exposure, deep sky astrophotography. Its proprietary sensor was specifically designed to record the brilliant red tones of H-alpha emission nebulae. Though any high quality digital camera can be used in astrophotography, no other camera on the market is made specifically with this objective in mind.

Nikon D810A DSLR camera. An astrophotography beast!
Shoot For Future Photoshop Image Composites
Every time I see an interesting sky I shoot a few frames to add to my personal stock library. I want the skies I use in my Photoshop image composites to be my own. Adobe has provided Photoshop users with a small library of skies in their latest versions, but I refuse to use the same sky images that tens of thousands of other photographers are using. It has become almost comical lately looking at hundreds of images, from hundreds of different photographers, that all incorporate the same sky!
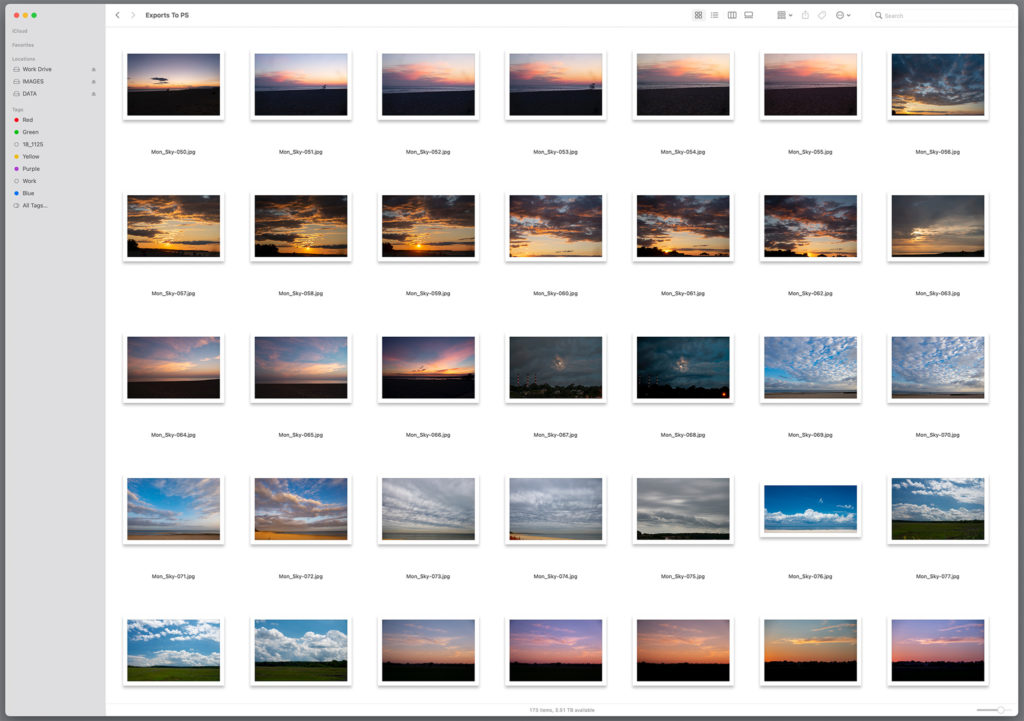
Some of the stock skies I have captured for my own unique sky library
The Photoshop application gives you the functionality of importing your own stock sky images to be used in sky replacement. I currently have about 200 of my own unique skies in my library and I am adding to it all the time. It’s a very simple process to import your skies into the program.
Getting The Individual Shot • The Motorcycle
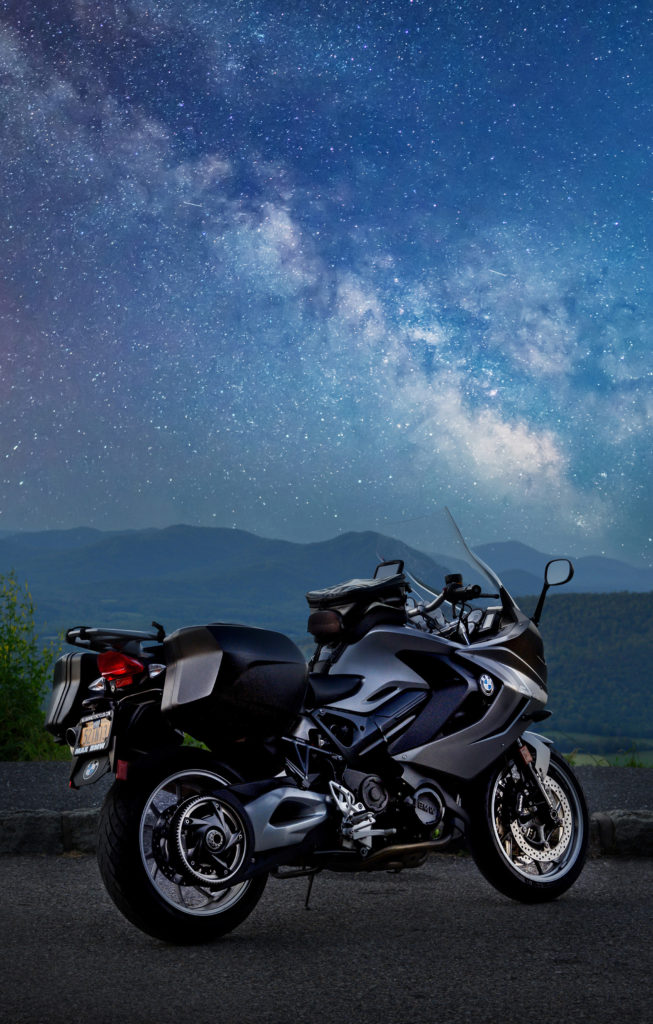
The motorcycle component of this image was created on The Blue Ridge Parkway; a few miles south of its northern terminus near Rockfish Gap, Virginia. As I rode south out of Waynesboro, Virginia I came upon a scenic overlook on the right side of the legendary byway which offered an unobstructed view to the southern skies.
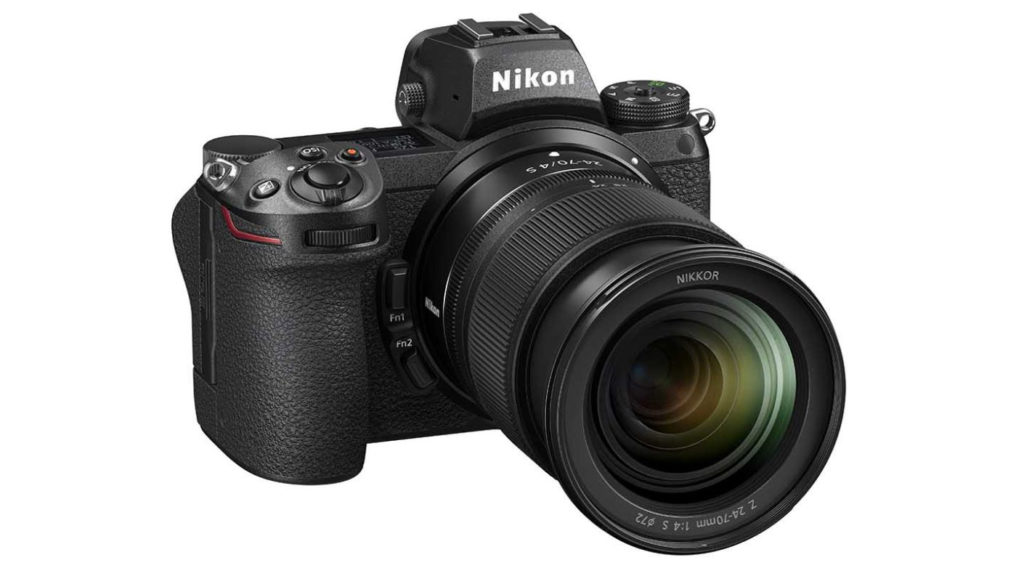
Nikon Z7 Mirrorless camera used to capture the subject motorcycle
Arriving in “the blue hour” just after sunset I positioned the bike where its right side was being illuminated by the fading daylight and the LED headlights of a car sharing the parking area with me. I took the LED flashlight out of the emergency kit I carry on the motorcycle and laid it on the ground to my left to illuminate the back of the bike. Setting my Nikon Z7 mirrorless camera up on a tripod I made a couple of bracketed exposures of the motorcycle in its glorious environment. All that remained to be done was head into the digital darkroom and composite this image with the shot of the Milky Way.
Making Magic In The Digital Darkroom
When making Photoshop image composites the most important thing to consider is that the lighting and tonality of the images harmonize with one another. If they don’t the picture will not be believable. Working with the RAW files in Adobe Lightroom I made white balance and exposure adjustments so that both images complimented each other. Both images were crafted to emulate the blue tones of late night.
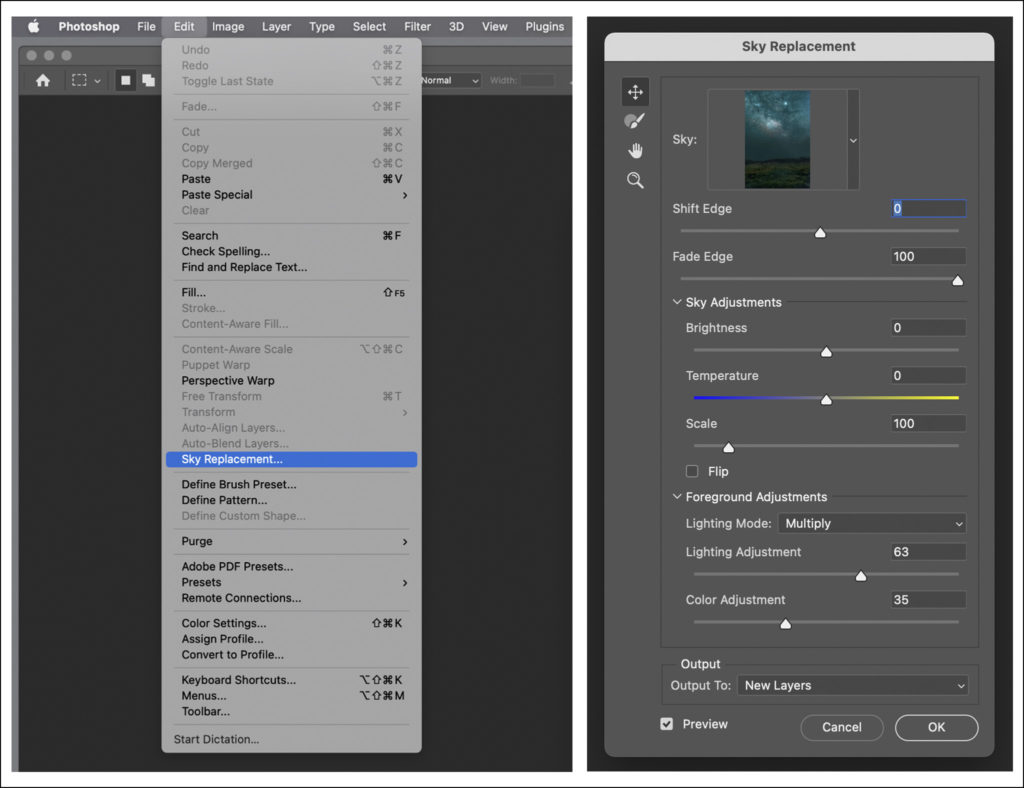
The image of the Milky Way was then loaded into my library of stock skies within Photoshop. I opened the image of the motorcycle in Photoshop and chose “Sky Replacement” from the edit menu. I navigated to the Milky Way image, which now resides permanently in my Photoshop application, and simply click “OK” in the pop up window. That’s it. One second later I have my perfectly crafted composite.
I often produce simple image composites for social media use when I’m out on the road. I always travel, even on my motorcycle, with a MacBook Pro laptop computer onboard. When crafting a composite such as this one, however, I prefer to be at my desktop workstation with the benefit of greater processing speed and access to the high speed RAID storage of the multiple images I will be manipulating.
Getting The Shot In The Camera
Could this final image have been crafted in camera? Yes, but it would involve the perfect alignment of a few different environmental factors. For starters we need the Milky Way which is only vividly visible on the North American continent from about May through September. We need to schedule our photography shoot on the perfect night. The Milky Way is only visible in very dark skies so our shoot must be scheduled on the night of the new moon…plus or minus a day or two.
The shoot must take place in a location with a clear view of the southern sky where the Milky Way will appear. The weather must be clear…no clouds, fog, haze or smog can be present to obscure the view of the night skies. The location must be in an extremely dark geographical area. If you’re anywhere within even 50 miles of a major city, the light pollution in the sky will obscure any good view of the Milky Way. Also you must give consideration to physically getting your subject (in this case the motorcycle) to this dark, remote location.
Once on the scene you’ll set your camera on a tripod and create your base exposure of the subject (the motorcycle) as described above. Then wait. And wait. And wait. Probably three, four or even five hours for the Milky Way to be visible in the sky. The camera/tripod must not be touched and remain perfectly in place during this waiting period. Your framing and focus can not be altered whatsoever. When the Milky Way is visible you make your second exposure (the sky) and you’ve got your shot in camera.
This assumes, of course, that you made the perfect exposure for both the subject and the sky on the first take. In reality this is extremely unlikely and you’ll want to be able to choose from a number of bracketed exposures of both the subject and the sky. For optimal imaging of the night sky you’ll want to stack the Milky Way images using an application like Starry Landscape Stacker to achieve an image with the minimal amount of noise.
So even capturing the image “in camera” will still involve blending (compositing) the foreground and night sky exposures in Photoshop. Technically it’s still a composite and, in my opinion, is no more of a “pure” photographic technique than the way I went about crafting it. Plus it involves too many variables to make the effort a predictable one.
Commercial Considerations
The ability to create Photoshop image composites enables today’s photographer to produce images limited only by the imagination. When a client, such as a magazine’s art director, requests that a particular finished image be created, it is best to produce it as predictably and masterfully as possible. Too many variables were at play here in this shot. Relying on Mother Nature for her absolute cooperation in capturing this shot “in camera” would have been an unrealistic fool’s errand.
Very few commercial clients have the budgets (or the patience) to risk their production costs and deadlines to the whims of the environment. Professional editorial and advertising clients are well-versed in the art of Photoshop image composites. Accept the process as just another tool in your creative toolkit, or risk becoming irrelevant in the marketplace.
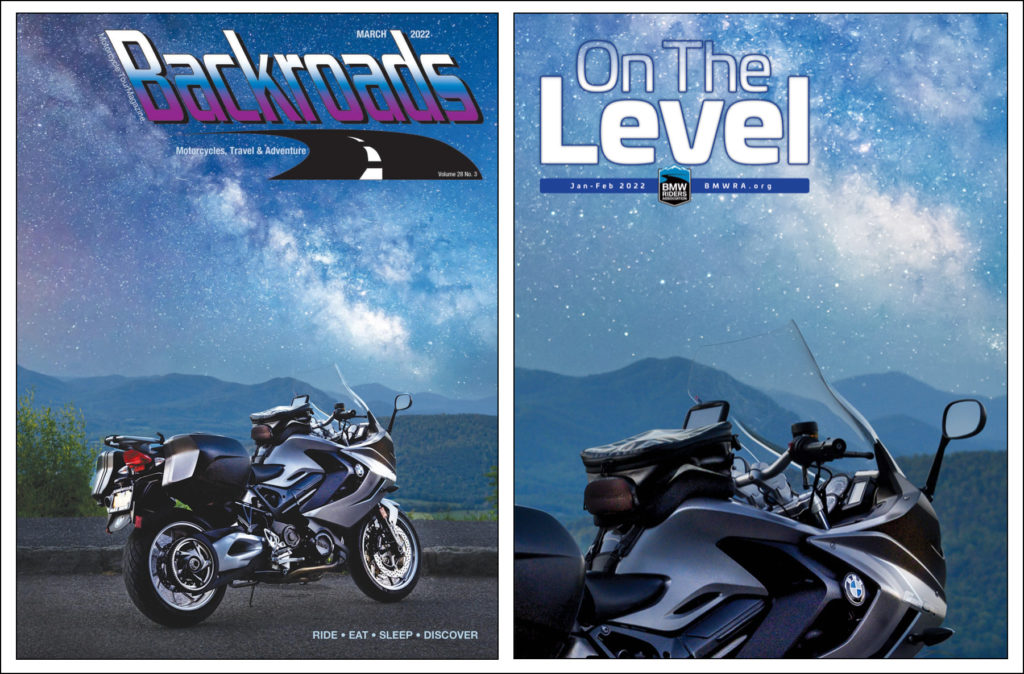
This image was ultimately picked up by two different magazines. The two art directors had two completely different visions for the final layout of their printed pieces. Both were so enamored with the image that they used it as the cover shot for their individual publications. The finished creative results are presented here:
Conclusion
We hope you enjoyed the information provided in this feature, regardless of where you stand on the philosophical questions surrounding the “purity” of image compositing. Our hope is that we can help those who are so-inclined to become better, more competitive, image makers in an evolving market. As always we welcome your comments below. Be sure to subscribe to Roadcraft USA for notifications when new features hit the blog.
Please help support the Roadcraft USA online resource by making product purchases through the links in this post. As Amazon Associates we earn commissions from qualifying purchases made through these links. There is no additional cost to you whatsoever. Thank you for your support!
Click Here to view an interactive visual index page where you can quickly browse through all of the great features that are published on the Roadcraft USA blog.
This is a great post. Thank you!
Thank you, Renee. Be sure to subscribe to receive notifications when future posts hit the blog.